While perusing my previous posts, I realized that I had never followed up the post
A fun Day at the Hacienda de Grande Hombre. Well folks, I followed the recipe:
Fill a gallon jug two-thirds full of water. Dissolve as
much plain salt (non-iodized) in the water as possible. Stir the water
as you add the salt and when you see the crystals sinking to the bottom
instead of dissolving, that is enough salt. (It will take about 2 lbs of
salt to a gallon of water)
Place the skin in loose fold (not rolled) in the salt water solution.
Seal the jug, and leave a room temperature (70 degrees) for four days. Rotate the jug gently once or twice a day.
Remove from he salt water on the fourth day. Rinse for several minutes and lightly pat dry on towels.
Mix a solution of equal parts glycerin and water. Pure glycerin is available at most drugstores.
Two pints of glycerin mixed with water is sufficient to treat three medium-sized snake skins.
Place
the skin in the glycerin solution, cover and let stand at room
temperature for another four days. Rotate but do not shake the jug
daily.
After the skin has been in the glycerin solution four days, remove and pat dry with a towel.
Place
the dry skin on an unfinished, dry, flat pine board. The boards must be
long and wide enough to sandwich the whole skin. Do not stretch the
skin to flatten it, just roll it out smoothly on the board. Use the flat
of your hand to remove and wrinkles.
Place a second pine board on top of the skin. The skin must be firmly pressed, so weigh down the top board.
Instead of weighing down the board I used drywall screws and screwed the boards together about every 2 inches around the perimeter. (pictures taken in unfinished kitchen I was working on, this was what I was tearing out when I had the "Fun Day')
Let dry for four days. It may take a little longer in the dead of winter or in humid conditions.
When
the skin is dry, it will be soft and pliable. Put a little talcum
powder on the dry hide and roll it around on an old paper-towel roll (
one of those cardboard rollers) and it will keep until you are ready to
turn it into a hatband or mount it on a display board.
I of course decided to make a hat band. I went to a local
Tandy Leather Store where I explained
to the proprietor what I was trying to accomplish, that I need some strips of suitable leather and Rubber contact cement. He helped me find a bottle of the cement which is used for just such purposes. He then gave me some scraps of leather. He even cut several pieces to width for me.
When I arrived back at the Hacienda, I found that I had more than enough snake skin to make two hat bands, so that is what I decided to do.
Using a razor knife I cut the skin lengthwise down the middle so that I had two pieces approximately the same length and width. I then turned them over and using one of the leather backing strips as a guide, I applied the contact cement liberally in the approximate center of the skins. I then applied contact cement to each of the outside (smooth side) of leather strips. Once this was completed I had to allow them to "set up" before I could join the skins and leather backing.
 |
| Applying rubber cement to the leather backing |
|
|
|
 |
| Applying cement prior to folding the skin over the back of the leather backing strip |
 |
| Ready to fold skin over leather backing to finish the 2nd Band trimmed off excess length |
|
|
|
|
I then cut the skin so that there was about 1/2" beyond each end of the leather backing and I made it square. I then carefully folded the ends over, and pleated the sides and folded them over also.
 |
| The two pieces of snake skin completely joined to the leather backing (view 1) |
 |
| The two pieces of snake skin completely joined to the leather backing (view 2) |
Once the skins and leather had been joined I needed to decide how I would join the ends. I decided to use Leather Boot Laces. I then used a leather punch to punch two holes in each end of the two hatbands. I then threaded the laces through them as you would if you were lacing shoes.
 |
| Back of Hatband after lacing |
 |
| Front of Hatband 1 |
 |
| Front of Hatband 2 |
 |
| Top view of the Hatbands on the pine board used to cure the skin |
 |
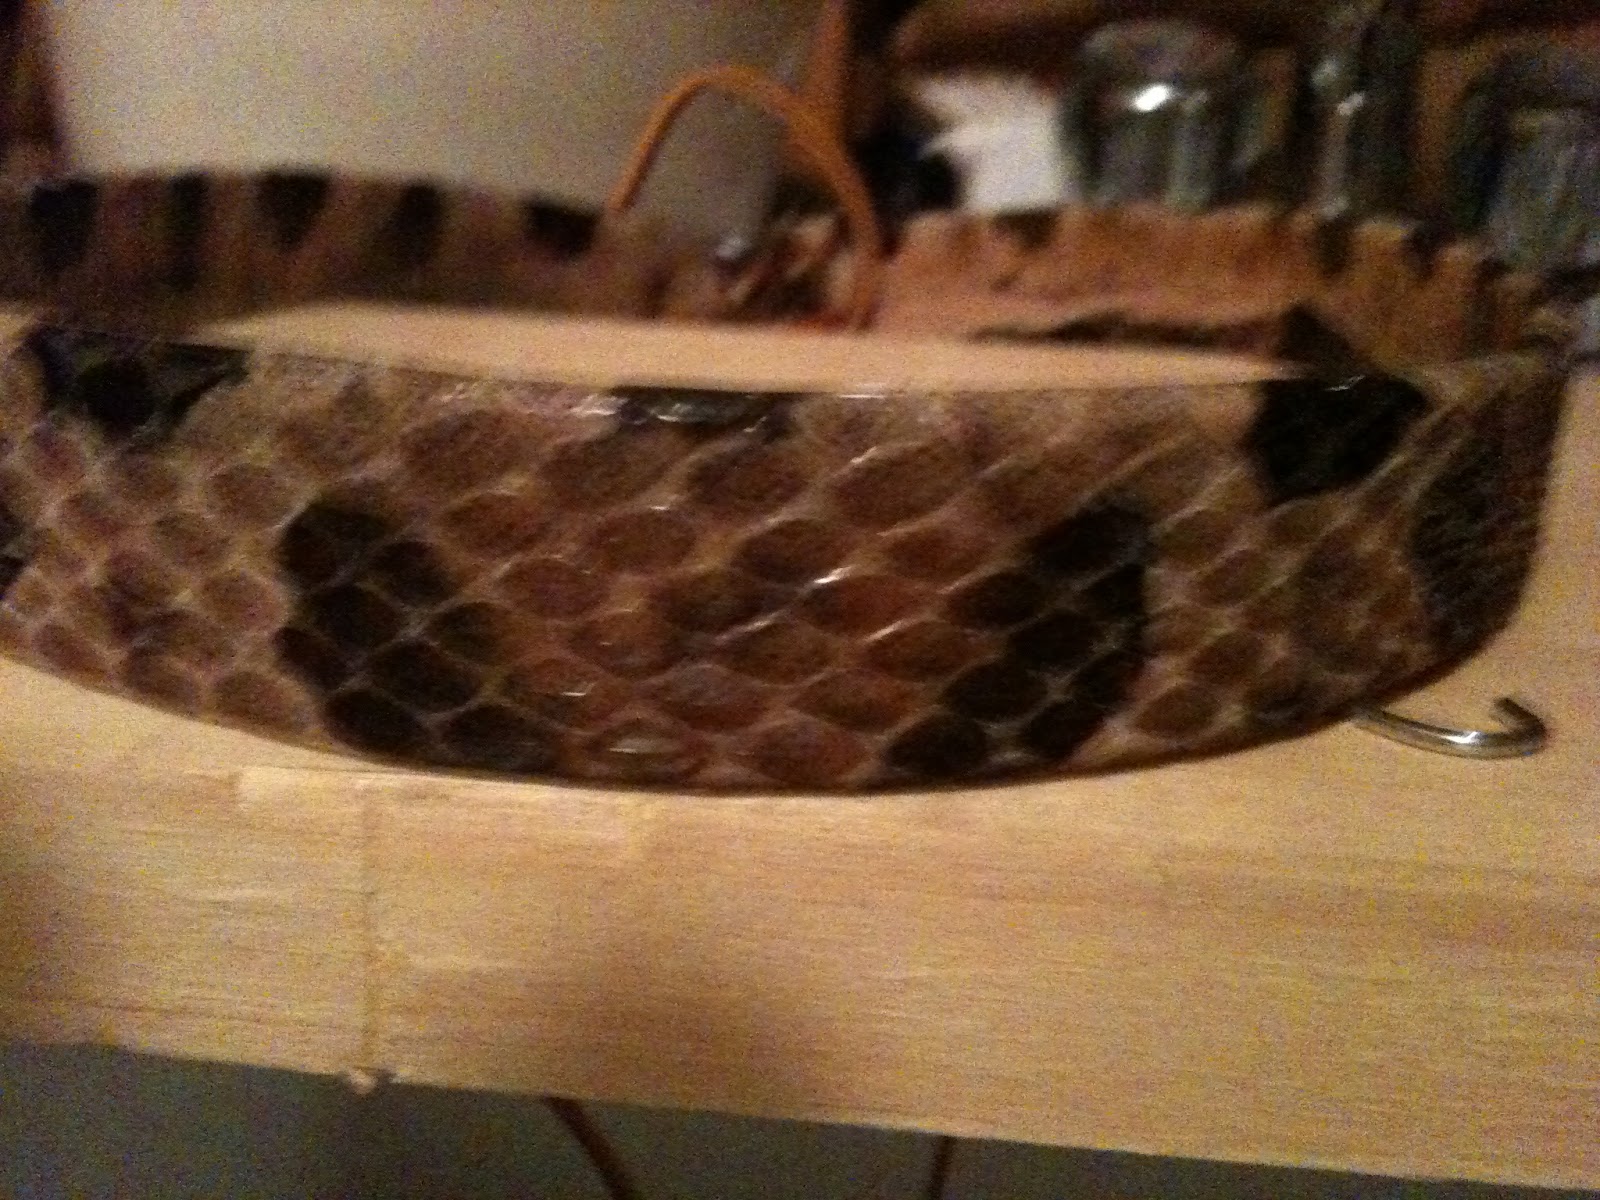
| Inside of a hatband, you can see the different type of belly scales on this one |
Well now I had two beautiful custom hatbands, and I still only had a single head, with no hat. I decided that I would make a gift of one hat band to MBB (My Big Brother).
I gave him the hatband on a trip to his homestead in the great northwest. I described to him how I was thinking of braiding the tails of the laces on my hatband and putting silver beads in the shape of skulls in the braid. MBB also has a crafty streak in him (in more ways than one). He has made on occasion, very nice zipper pulls he creates out of braided wire, semi-precious stones, silver, pewter and other metals. He whipped out his collection of items he had for the fabrication of the pulls and found several solid silver miniature facsimiles of a Celtic Battle Axe Heads. He gave me one for my hatband and promptly figured a way to attach one to his.
I now had one last item to take care of in order to finish this project. I needed a Cowboy hat. Not just any hat would do, it would have to be either a Resistol or a Stetson. I had the maker somewhat narrowed down, so the final choice would have to be based on style. I had already decided on Black... Yes, I know, in the parlance of my childhood, good guys only wore white or light colored hats.. Except for
Paladin of course. I decided that the snakeskin would stand out better against a black background.
It took me a while, but I finally settled on a hat style, I liked the hat that Timothy Oliphant wears as the character US Deputy Marshall, Raylan Givens in
Justified. The hat is a Stetson Carson model. Raylan's hat is "Silver Belly", mine would still be black. I went to a local Western Wear shop, determined my size, and ordered a hat.
 |
| Black Stetson Carson hat (by the way, this photo was taken in the same general area as the earlier photos of the hatband creation, I finished the kitchen) |
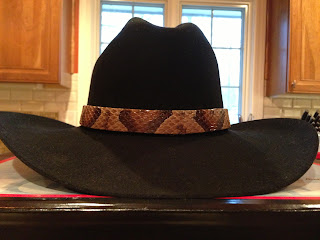 |
| Front view of the hat, the black really makes the Copperhead pattern pop. |
 |
| Side view of the hat, from this view you can see how the hatband stands out, and the sweep of the brim |
 |
| Rear of hat and Band, I left the leather laces long, added a third piece to make braiding easier. You can see one of the skull beads about 3/4 of the way up, three at the bottom, they are pewter. The Silver Battle Axe head is visible. |
 |
| Close up of the Skull Beads |
 |
| A Skull bead and the Silver Celtic Battle Axe |
 |
| The Front Center of the hatband. |
I am very satisfied with the results, I have had many positive comments. Someone even asked if I would sell the hatband or if I would make another. I told him, no, and no... I really don't want to meet another 4' copperhead.